CLOSE

Categories

Match Made in Heaven

“I have fallen in love with this flute and continue to fall in love each time I play it. This is the perfect flute for me; a match made in Heaven to say the least. Thank you so much for allowing me the opportunity of the trial program. Over the course of a week, I’ve received a ton of great feedback from my private teacher, my accompanist, my former music educators, my classmates, and most of my professors. Every one of them told me the same thing: keep the Miyazawa!!!”

JESSICA L. MORGAN

Care & Maintenance for Your Miyazawa Flute

Taking care of your flute doesn’t have to be complicated—but it makes a big difference.
Simple habits like swabbing after you play, handling with care during assembly, and getting an annual Clean-Oil-Adjust can keep your flute playing up to its potential. It also helps you avoid expensive repairs and keeps your instrument in great shape over time.


Before You Play

Remove your rings and be mindful if you are wearing bracelets, necklaces, or anything with a zipper or metal buttons. Yes, jewelry is gorgeous—but it is prone to leaving scratches. It is notorious for scratching areas like the embouchure, where we need absolute precision. 


Assembling Your Flute

It is important to assemble and disassemble your flute with care. Do not grasp or hold the flute near the mechanism. This can cause the flute to go out of adjustment and possibly damage the mechanism. To properly assemble your flute:

Body + Footjoint

  • Hold the body at the barrel 
  • Hold the footjoint below the keys.
  • Connect the two with a gentle twist—avoid rocking or forcing the parts.

Headjoint + Body

  • Hold the headjoint just below the lip plate.
  • Insert with a light, steady twist.
  • Many technicians recommend turning in one consistent direction for a smoother fit.

Do you own a flute stand or flute mat? If so, use this—not a music stand—when setting your flute down assembled. Always place your flute on a flat, stable surface. This small habit helps prevent slips, dents, and the slow buildup of micro-scratches.


After Every Playing Session

You can extend the life of your pads and reduce instrument maintenance by swabbing out the inside of your flute with a soft, absorbent cotton cloth after every playing session. Wiping down the outside surface can keep fingerprints and tarnish at bay, keeping your flute looking its best!

  • Swab the inside
    Use the included cotton swab with wooden rod or any soft, absorbent cloth. Flute flags can also be a good option. Moisture left inside can swell pads causing leaks, shortening their lifespan.
  • Wipe the exterior
    Gently remove fingerprints and oils with a clean, dry microfiber cloth.
  • Avoid silver cloths and powders
    They often leave residue that gums up the mechanism or sticks to pads—more harm than help.
  • If using silver polish
    Use sparingly, applied carefully to the cloth (do not apply directly to the flute) and far from any pads or moving parts.
  • Return the flute to its case
    Though it’s convenient to leave your flute assembled for your next practice, always store it safely in its case. Leaving it out can cause the joints (tenons) to seize up and accelerate stubborn tarnish.

Caring for Your Flute Pads

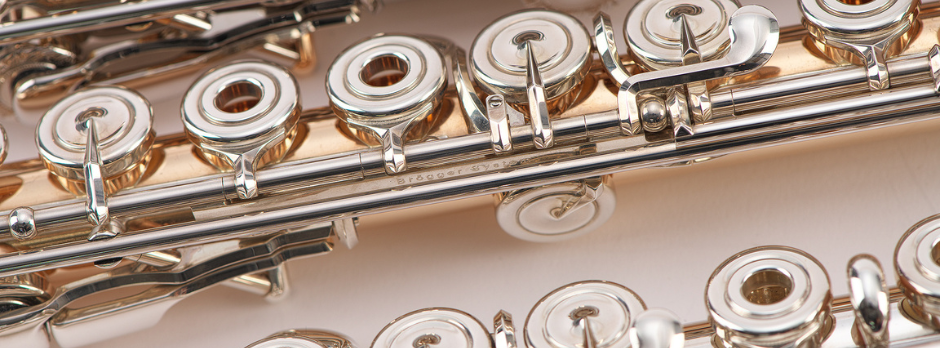
Your flute may have Straubinger™ Pads, which are known for their exceptional stability and precision. One key advantage: these pads tend to hold their adjustment significantly longer than traditional felt pads.

Cleaning Tips for Straubinger Pads:

  • Avoid rubbing the pad edges or key cups. The edges of Straubinger Pads are very firm and hard, and thus they are susceptible to wear if the edges are rubbed frequently.
  • Use a soft, lint-free cloth—never drag cloth across the pads
  • Gently clean around keywork to preserve adjustment

    If your flute uses premium felt pads instead:
    • Made from high-quality pressed felt
    • Deliver excellent response and seal
    • Require the same care approach: avoid contact with pad edges during cleaning
  • General Maintenance Tip:
    • Consistent, gentle cleaning and carefully avoiding the pad edges helps prevent costly adjustments and extends pad life

Retaining Rings and Plug Removal

The retaining rings that hold pads in place are designed for enhanced stability and precise adjustments—a technically superior approach to traditional methods. However, if a plug is pushed through the tone hole during removal, the retaining ring may come out unintentionally, potentially affecting pad alignment.

To safely remove a plug:

  • Use a fine pin to gently lift the plug from the top
  • Pull upward—never push down through the key
  • Be cautious and don’t scratch the tone hole or surrounding keywork

Additionally, you can reference this video created by a Miyazawa certified technician!


Recommendations for Maintenance

  • Book a COA (Clean, Oil, Adjust) once a year with a qualified flute technician to keep response, intonation, and mechanism at their best—and protect resale value.
  • If you play several hours daily or your skin is more acidic, consider every 6–9 months.
  • A COA appointment includes:
    • Complete disassembly, cleaning and polishing of flute tubing and mechanism
    • Re-oiling of mechanism
    • Leveling of pads to toneholes
    • Replacement of torn pads
    • Mechanism regulation and adjustment
    • Replacement of headjoint cork
    • Includes 1-month warranty

With just a bit of consistent care, your Miyazawa will remain responsive, reliable, and stage-ready for years to come. Routine care and maintenance isn’t just upkeep—it’s part of being a musician. These small habits protect not only your instrument, but the sound and artistry you’ve worked so hard to shape. If you ever have questions or need guidance, our team and network of trusted technicians are always here to help. We love hearing from our players and are proud to support you on your musical journey!

By using this site, you agree to our Privacy Policy.